Showing posts with label How To. Show all posts

Tuesday, November 8, 2011

How To: Customized your Blog Icon using Favicon


One of the things that can give a blog more of an identity and a brand is a logo that people will come to associate with the blog.In the same way we become used to seeing the logo of a blog also used as the favicon.

Favicons are an important part of how we see a blog and how we remember a blog.In a previous Blogger Tip i showed you how to add a favicon to blogs on Blogger but today Blogger have taken action and made it part of the options on your blogs design page.So from now on with just two clicks you can add a custom favicon to your blog.


What is a favicon ? A Favicon is the small image you see beside the address bar in your browser and depending on the browser you use it is also visible in the tab menu.If you look beside the address for this page at the top of your page you should see the same brush logo that is in the header.For more information here is a link to the wikipedia page on Favicons.

To see how to have a custom favicon on your blog check out the blogger in draft post here - Customize Your Favicon.

Thanks to: SpiceUpYourBlog


Sunday, October 23, 2011

How to: Enable Facebook Timeline Right Now


Last September 22, 2011 Facebook announced Timeline, a crazy (and kind of creepy) omnibus look at everything that has ever happened in your Facebook lifespan. It’s like a story book of your life — or at least the online, documented parts.


Facebook said that Timeline would be on the way for everyone sometime in the coming weeks… which is great and all, for everyone else. You’re the type of person who reads TechCrunch, and are thus likely the type of person who likes their new and shiny things right now.

That’s okay. We can make it happen.

Fortunately, enabling Timeline a bit early isn’t too difficult — but it’s not at all straight forward, either.

You see, Facebook is enabling Timeline early for open graph developers. You, too, can be an open graph developer — even if you’re just looking to dabble.


A few things to note:
  • You probably don’t want to do this unless you’re actually a developer. Expect bugs.
  • Only you will see your timeline at first (unless you decide otherwise), but it will automatically go public after a few days. My timeline was automatically hard-set to go public on September 29th.
  • It seems that if you login into Facebook on another machine, Timeline gets disabled automatically on all of your machines. With that said, it seems you can get back to your timeline (but ONLY after following the steps below) by navigating to http://www.facebook.com/YOURUSERNAMEHERE?sk=timeline
  • You’ll need to have a “verified” account for one of the steps, which means you need a credit card or phone number attached to the account.


Here’s how to do it:


1. Log into Facebook

2. Enable developer mode, if you haven’t already. To do this, type “developer” into the Facebook search box, click the first result (it should be an app made by Facebook with a few hundred thousand users), and add the app.


3. Jump into the developer app (if Facebook doesn’t put you there automatically, it should be in your left-hand tool bar)

4. Create a new app (don’t worry — you wont actually be submitting this for anyone else to see/use). Give your shiny new app any display name and namespace you see fit. Read through and agree to the Platform Privacy agreement. This is the step you need to be verified for.

5. Ensure you’re in your new app’s main settings screen. You should see your app’s name near the top of the page

6. Look for the “Open Graph” header, and click the “Get Started using open graph” link.
Create a test action for your app, like “read” a “book”, or “eat” a “sandwich”


7. This should drop you into an action type configuration page. Change a few of the default settings (I changed the past tense of “read” to “redd” — again, only you can see this unless you try and submit your application to the public directory), and click through all three pages of settings

8. Wait 2-3 minutes

9. Go back to your Facebook homescreen. An invite to try Timeline should be waiting at the top of the page
And you’re done! We’ve seen this work quite a few times now, so it should work without a hitch for just about anyone.

Source: TechCrunch


Saturday, October 8, 2011

Tips on How to get your Max Download Speed (uTorrent)


1. Increase Your uTorrent Download Speed! Follow these steps:
  • Torrent Client > Preferences > Bandwidth > Number of connections > Set aprox. 500 for each
  • Torrent Client > Preferences > BiTorrent > Protocol Encryption > Forced
  • Bandwidth Allocation - High (Set download/upload limit - Unlimited)
  • Stop Other Active Torrents - Start downloading and wait for connections.
2. Close Streaming Videos or Musics

3. Try uTorrent Turbo Accelerator

What is uTorrent Turbo Accelerator?

uTorrent Turbo Accelerator is a newly added software in the family of the popular p2p client uTorrent plug-ins. The highly developed architecture behind this app allows you to download movies, music, games and other files you want at the highest possible speed. With uTorrent Turbo Accelerator not only the bandwidth of your Internet connection is managed noticeably with more efficiency but you will have the advantage of locating more sources to download from. 

Installation:


1. Unzip the file after download
2. Find setup and serial inside
3. Run utorrentturboaccelerator_installer and install
4. Run the program after installation *Do not update to the latest version*
5. Register the program with the serial key located at the downloaded folder (serial.txt)

After that click "Run Torrent" and now your uTorrent download speed is boosted!


.


Saturday, October 1, 2011

How To: Remove/Disable WAT Update on Windows 7


If you don’t activate Windows 7 within 30 days after installation, you will not be able to use every feature of Windows. You can regain full use of your computer by activating Windows.

To activate Windows 7 LEGALLY on your computer, do the following:

Open Windows Activation by clicking the Start button, right-clicking Computer, clicking Properties, and then clicking Activate Windows now.‌ If you are prompted for an administrator password or confirmation, type the password or provide confirmation. If you want to activate it legally, just buy a original copy of Windows 7 to save your problem

BUT

If you want it to do the other way around so it won't cause you a lot of dollars, here is what you need to do! :)

This is the easiest solution for your problem of removing the WAT update in Windows 7. Just follow the instructions below.

INSTALLATION INSTRCUTIONS:

1. Download the WAT Remover here.

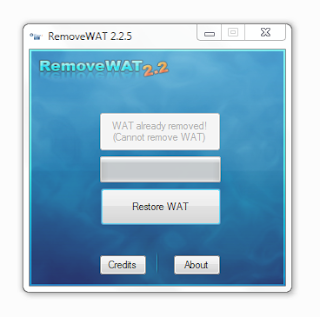
2. Run the crack as administrator. (In my case, it is already removed. I just show you how it looked like)
 3. Click on remove WAT.

4. After that a message will prompt that the system will be rebooting

5. Right Click the MyComputer icon on your computer and the WAT is now removed. See it for yourself!


How To: Hack Windows and Mac User Account Passwords


Password cracking seems like a difficult task but these techniques make it as simple.We’ll show you some software which cracks windows, mac, and linux user account passwords in a just a few minutes. The programs basically do all the hard work for you as noted in this tutorial.


Breaking into a computer is an illegal activity but it does help to know how to re-access your own equipment.  So, this post is for informational and ethical purposes only! This how-to covers three OS we use and the methods to crack the log-in passwords.


Windows

For Windows OS, Ophcrack is the tool of choice. It is a free Windows Password cracker based on Rainbow Tables. It has a GUI which makes it easier to run. The software can decipher passwords up to 14 characters in length in a quick 10 seconds.

To use Ophcrack one needs to download the Ophcrack ISO and burn it to a CD (or load it via a USB drive). Run the CD by loading it in the tray and restarting the computer with the power switch. Switch to the BIOS options and set the computer to boot from the CD Drive. The computer boots up and reads the Ophcrack CD which then proceeds to break the password. Use this password to log into the machine.

Ophcrack is a multi-platform software and so can be used for Mac and Linux too.


Mac OS X

Apart from Ophcrack, another simple method involves using the Mac OS X installation CD (for v10.4). Insert and reboot to display UTILITIES. Choose RESET PASSWORD to get a new one. Login using this password. To reset the password in Mac OS X 10.5, reboot the computer and press COMMAND + S.

At the prompt type in:

sck -fy
mount -uw /
launchctl load /System/Library/LaunchDaemons/com.apple.DirectoryServices.plist
dscl . -passwd /Users/UserName newpassword

Login with the new reset password.


Source: HACKNMOD


Thursday, September 29, 2011

How To: Install Windows 8 Operating System


Microsoft just release its new operating system, Windows 8. Preview the latest version of Microsoft's new OS. This will let you install it and use it without screwing up the rest of your computer. Just follow the instructions carefully and make sure you have a high-spec computer. Enjoy!


Minimum Hardware System Requirements (Windows 8) below:
CPU: 1 GHz or faster
RAM: 1 GB ( for 32-bit) and 2 GB (for 64-bit)
Hard disk: 16 GB (for 32-bit) and 20 GB (for 64-bit)
DirectX 9 graphics device with WDDM 1.0 or higher driver


Credits: Gigafide


How To: Jailbreak iPhone/iTouch using Cydia on JailBreakMe


As you know, the iPhone Dev team has released a browser-based jailbreak tool known as jailbreakme that is capable to jailbreak all models of iPhone including iPhone 4, 3GS (both old and new bootrom) and 3G running on the latest version of iOS (i.e. 4.0 or 4.0.1).


If you have used Spirit before, you should enjoy the one-click jailbreak process. But I can say “Jailbreakme” is even simpler and more user-friendly than Spirit. It is so simple that I wonder if I still need to write a guide for it.

Anyway, to let those who do not familiar with the jailbreak process, here is the step-by-step guide to show you the process.

Before jailbreaking…

Before you jump to the jailbreak procedures, please read through the points carefully:

As usual, before kicking off the jailbreak, remember to backup all your iPhone data via iTunes. You can simply connect the iPhone to your computer and sync all the data. This step is crucial. In any case you are stuck in the jailbreak process, you can always restore your iPhone back to the original state.
Though JailbreakMe should work with iPhone OS v3.x, this guide is intended for those running iOS 4. So, I suppose you have upgraded to iOS 4.0 / 4.0.1. If not, please upgrade it via iTunes.
JailbreakMe should also work with iPhone that has been jailbroken with blackra1n or Spirit. But before using JailbreakMe, please restore the iPhone to iOS 4.0 / 4.01 via iTunes.
JailbreakMe will not hacktivate your iPhone. Your iPhone should be activated before using the browser-based jailbreak tool. You can either purchase an official SIM card or simply borrow it from your friend to activate the iPhone. Alternatively, you can also try out the phonebook SIM card to activate it.

Jailbreaking iPhone with JailbreakMe

1. As JailbreakMe is a browser-based jailbreak tool, no software download is required. All you need to do is to launch the mobile Safari on your iPhone and point it to http://www.jailbreakme.com.

Tip: If the above link doesn’t work, you can also try out http://jailbreakme.modmyi.com.

2. Next, you can simply slide the “slide to jailbreak” slider to kick off the jailbreak process.


3. The whole jailbreak process will take several minutes to complete. Once done, the tool prompts you that cydia has been added to your iPhone.


That’s it. Is it the simplest jailbreak tool you have ever used?

After jailbreaking… and you need to unlock

For iPhone 3GS and 3G user, if you need to unlock the iPhone, you can launch cydia and install ultrasn0w.

For iPhone 4 user, the iPhone Dev team will release an updated version of ultrasn0w to unlock iPhone 4 in these two days.

Not Working? Try again!

For some reasons, you may be stuck after you kick off the jailbreak process. In that case, you can simply reboot your iPhone and go through the whole process again. Usually, the jailbreak should work normally for the next trial.

If you have successfully jailbroken your iPhone, I hope you can leave us comment and share the iPhone model & OS version. You are also welcome to leave us questions in case you find any difficulties during the jailbreak process.

Enjoy jailbreaking!

Souce: SimonBlog


How To: Remove Windows Genuine Advantage (WGA) Notification


Windows Genuine Advantage (WGA) notifications pops-up when your computer did not passed the validation test. The validation test can be failed due to a (non-genuine) pirated copy of Windows XP. 


Sometimes you want your computer to be always up-to-date so you click the balloon on the bottom-right of your screen (the red shield-shape icon with an X on it) and change the Automatic Update settings to "Automatic (recommended)" which is wrong! You should turn off Automatic Update for it allows Windows to get updates from Mircrosoft and then the server detected that you have a pirated copy of Windows XP, so the balloon pops-up automatically every time you log on to your computer. You need to get rid of this problem as it can cause your computer to hang and shutdown randomly.


Okay here's what you need to do:

  •  Download Windows XP Crack here.
  •  Extract the .RAR file and Instal!
  •  Instructions are included in the folder (How To.txt)


Wednesday, September 28, 2011

How To: Disable Facebook New Chatbox


Facebook recently have some changes again, including in this change is the new Facebook's Chatbox which is very annoying! Liking pages like '999 million likes to get back the old FB chat' is useless, well I will teach you how to get back the old Facebook chatbox by installing some scripts. Don't worry, it's just a few clicks away!


You just need to install 'Sidebar Disabler' script on your browser, It only works if you are using Google Chrome, Mozilla Firefox and Opera. After you have installed the extension, restart your browser and enjoy using the old Facebook chat-box style!
      • Install 'Sidebar Disabler' for Chrome here
      • Install 'Sidebar Disabler' for Firefox here
      • Install 'Sidebar Disabler' for Opera here


Design by Free WordPress Themes | Bloggerized by Lasantha - Premium Blogger Themes | JCpenney Printable Coupons